What Do You Need To Do Eyelash Extensions at Home?
You don’t need to pay a visit to a professional lash tech to get glam lash extensions. Anyone can apply eyelash extensions at home with a handful of simple tools.
Of course, you can buy the tools individually, but the easiest way to ensure you have what you need is with a dedicated kit. At-home lash extensions are easy to get, easy to apply, and easy to love!
Components of a Starter Kit
There are like a million at-home lash extension kits on amazon and at specialty shops, ranging from cheap and terrible to expensive and fine. But how can you figure out which ones contain the tools you actually need to get started with eyelash extensions at home?
You want a high-quality kit that won’t break the bank and won’t have you running to a professional lash technician because it was hard to use or ruined your lashes. Quality is really the key, especially when shopping for your first-ever kit — first impressions matter!
Let’s consider what should be in your basic lash extension starter kit:
Lashes
Everybody’s favorite part of a lash kit is the lashes. After all, they’re the star of the show! A good starter kit will contain at least three full sets of lashes. When shopping around for a beginner lash kit, check the lash quality. The best lashes are vegan and cruelty-free — animal cruelty simply isn’t cute.
Among synthetic fibers, we prefer premium Korean PBT silk since they look and feel so natural. In a starter kit, you want a simple, easy-to-manage classic lash style, like our Amplify, Bold, or Curl lashes.
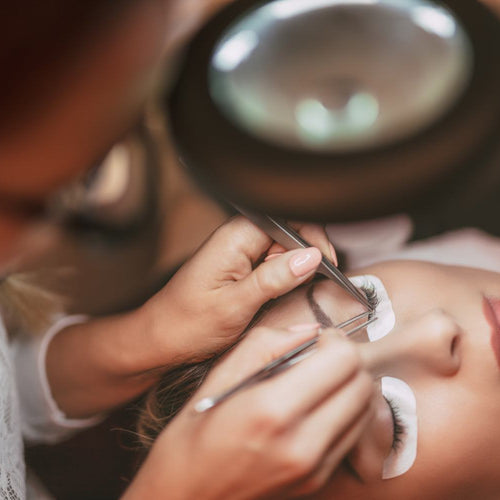
Applicator
A DIY lash extension applicator looks like a curved pair of tweezers. You’ll need this tool to place your false eyelashes on your natural lashes.
Some applicators are no more advanced than drug store tweezers, but Lashify’s applicator, the Fuse Control Wand, is curved to mimic the curve of your eyelid and comes in a variety of colors. Regardless of the quality, this essential tool is an essential part of any kit.
Adhesive
Your lovely lashes need something to hold them in place, or else they’d blow away with a flutter of your eyes. Not all adhesive is created equal, as the adhesive can range from beneficial to downright toxic.
A ton of lash glues on the market will damage your natural lashes and lash line. Any adhesive you apply to your delicate lashes should be completely free from cyanoacrylates, parabens, and formaldehyde. Always read the adhesive ingredients carefully before trying a new lash glue.
A high-quality adhesive should nourish your natural lashes, just like Whisper Light, our bond: it’s cruelty-free and vegan, free of cyanoacrylates, parabens, and formaldehyde, and contains biotin to cushion your lash line and nourish your lashes at the same time. It goes on white but dries clear, making it the perfect bond for a beginner.
Sealer
A sealer (or sealant, tomato tomahto) is the top coat of lash application: it protects the bond and provides extra strength, just like a clear coat of nail polish would do for your manicure. Always read the ingredient list carefully to ensure you’re not swiping any unsightly toxins on your lashes that could harm your extensions, natural lashes, or eyes.
Like adhesives, you never know what icky junk might be hiding there. Just another reason we recommend our Glass Finishing Coat since it contains good-for-you (or completely harmless) ingredients.
Cleanser
When working around your delicate eyes, you want everything to be clean. Having a clean face and clean tools not only prevents eye infections but also means a stronger bond for your lashes.
You want a cleanser that can clean your face and your tools, like our Pre-Cleanse Cleansing Solution, which can be used to prep your face before and clean your false lashes after every wear.
Remover
Don’t put on what you can’t take off! You absolutely don’t want to just pull your lashes off since that can cause damage to your natural lashes. Lash extension removal should never feel uncomfortable.
While your regular makeup remover will do in a pinch, you should have a remover specifically formulated to dissolve the lash bond without damaging the Gossamer, like our Melt Away Remover. What kit could possibly contain all of that? Oh, wait! It’s the Lashify Control Kit!
With everything you need to get started, the control kit is your one-stop shop, the perfect bundle of tools to fall in love with DIY lash extensions. It’s more cost-effective than seeing a professional lash technician and way more convenient.
On top of that, it uses super high-quality products because Lashify takes the care and keeping of your natural lashes very seriously. Extensions are meant to enhance your natural lashes, not replace them.
So, what exactly will you find in your Control Kit?
- Three Amplify, Bold, or Curl Gossamers (your choice of style and length!)
- A Fuse Control Wand, in bronze or hologram (also your choice!)
- A tube of Whisper Light Dual Sided Bond
- A Tube of Glass Finishing Coat
- A pair of Wandoms
- A sample of Precleanse Cleansing Solution
- A Sample of Melt Away Remover
- A magnifying mirror
- A storage case for your collection of (reusable!) Gossamers
What About an Advanced Kit?
We get it; you’ve got this whole DIY eyelash extension thing down clean. It’s time to level up your lash artist game. You want a more advanced look at home, something bigger and bolder (or dreamy and wispy) than the classic lashes.
So what's the best way to try out a few different volume Gossamers? To get a more advanced look at home, we have two kits to help you: The LED Control Kit and The Glutton.
The LED Control Kit
The LED Control kit has all the magic of the Control Kit but better. This kit includes four Gossamers, but instead of just the classic Gossamers, you can pick from all the Lashify collections: Classic, Intimates, Volume, and Prismatics.
You can mix and match styles and lengths as you please. The LED kit comes with the Sapphire Blue Fuse Control Wand, which is basically the most coveted and rare Fuse Control Wand.
As the name suggests, the magnified mirror in this kit has an LED light border with touch sensors to brighten and dim. Perfect lighting for the perfect lash application. It’s rechargeable and has a full week of battery on a single charge. It also comes with a foam storage case for up to eight Gossamer cartridges.
The Glutton
If you need more variety in your Gossamer storage box, the Glutton kit is the best value for the number of Gossamers you get. You get to choose nine (NINE!) Gossamers from literally any collection! In addition to a tube of Whisper Light Dual Sided bond, you can take your pick of two sealers, from the basic Glass to Night Bond or Control Wax.
The Glutton is the most customizable of all the Lashify kits. You also get to choose any color of Fuse Control Wand: Hologram, Violet Flame, Matte Egyptian Gold, Silver, Graphite, Citrine, Aventurine, Tourmaline, and Sapphire. Or, if your eyelids have less curve, you can get the petit Fuse Control Wand in Bronze, Silver, or Hologram.
How Do You Apply DIY Lash Extensions?
Applying your own lashes at home is easier than you might think. Let’s walk through the process step by step:
- Clean your eye area thoroughly. Get rid of any eye makeup, oils, or debris that might be anywhere near your natural lashes. Oil and solids will interrupt the bond of the lashes and may result in lifting lashes later. Make sure your eye area is completely dry.
- Prep Your Tools. Grab your Gossamers. To remove the Gossamers from the cartridge, you actually want to use your (freshly cleaned and dried) fingers, NOT the wand. Gently grab the entire fan of a Gossamer as close to the base as you can and gently slide it out of the cartridge. Once you have your Gossamer out of the cartridge, you can pick it up with your Fuse Control Wand. Wrap that Fuse Control Wand with a Wandom first, though. Hold the lashes so the base of the Gossamer points down, and the curl points back to your face– parallel to your natural lashes.
- Apply the Whisper Light. There are two ways to do this: applying it directly to the underside of your natural lashes or the Gossamer. If it’s your first time, applying it to your natural lashes may be easier, but it’s up to you which you find easier. Apply a super thin line of Whisper Light along your lash line. It will go on white but dry clear.
- Apply the Gossamer to your Lashes. Wait about thirty seconds for the Whisper Light to get tacky. Then, using your Fuse Control Wand, place the Gossamers along your lash line on the underside of your lashes.Look down into the magnifying mirror of your Control Kit while you place them; it makes it so much easier and more accurate. They should stay put but not be so stuck you can’t pick them up and move them still. To help get them to stay while you finish applying the set, give each Gossamer a quick reverse fuse with the tip of the wand.
- Fuse them! Once you’re satisfied with the placement of your Gossamer, time to use that Fuse Control Wand for what it’s named for! Hold the wand so the curve hugs your eye’s curve just over the spines of the Gossamers at your lash line. Press down to fuse for ten seconds or more before you release.
Pro Tips: If your Gossamers stick to the wand, don’t yank the wand away from your eye. Instead, blink slowly and gently until the Gossamers release from the wand.
Try doing an extra reverse fuse on the lashes at the outer corner: that area often gets less pressure from the fuse than the other lashes.
We have several video tutorials to help you the first time (or the fifth time!) you apply your Lashify lashes step by step. Our channels will show you some pro tips and false eyelash hacks. If you love our full videos on YouTube, you should also follow us on TikTok!
Can I Start Right Now?
You totally can! Toss that mascara in the bin and kiss that eyeliner goodbye. Say hello to everything you need to do classic or volume lash extensions at home in one convenient kit.
Sources:
Want to Check the Ingredients in Your Beauty Products? | Byrdie
The Lashify LED Control Kit® | Lashify
Follow along for your first time using Lashify | YouTube
Glass Finishing Coat | Lashify
Whisper Light Bond™ (Single-Sided) with Micro-Flex | Lashify